
Introduction to Web Scraping with Python
Session 4: Introduction to Web Scraping with Python
You can find a copy of the original Jupyter Notebook file here, and here’s a video recording of the session:
What we’ll cover
This tutorial assumes very limited knowledge of Python, which we will review.
Next, we will go over the basics of HTML, how to retrieve a page’s HTML source code with Python, and how to use the Python library BeautifulSoup to parse the page and extract the data we are interested in.
We will then work a practical example (scraping data from the NYC Worker Adjustment and Retraining Notification website).
Finally, we will switch libraries and look at how Selenium can be used for more advanced scraping projects that require interacting with the webpage.
What is web scraping?
Web scraping, web harvesting, or web data extraction is data scraping used for extracting data from websites. Web scraping software may access the World Wide Web directly using the Hypertext Transfer Protocol, or through a web browser. While web scraping can be done manually by a software user, the term typically refers to automated processes implemented using a bot or web crawler. It is a form of copying, in which specific data is gathered and copied from the web, typically into a central local database or spreadsheet, for later retrieval or analysis.
(Source: Wikipedia )
Legal and ethical concerns
Last updated April 2020
As long as you are not using the data you scrape commercially and it is not behind a user authentication, web scraping is generally legal. However, you should always consult with your editor before beginning any scraping project. Additionally, you should check if there is already an API that provides the data you are looking for which will save you time and headaches.
Also, we have to be good players and learn to follow guidelines for responsible scraping: respecting sites’ robots.txt file (more on this later) and limiting the number of requests we make so as not to overload a server.
Read more about a recent change in scraping rules here.
Part 0: Python Review
This is a quick review of Python basics. For a more in depth introduction, see Mark Hansen’s Introduction to Python
Saving Data: Save values on the right hand side of the equals sign to named variables on the left hand side.
p = 11 + (100 * 3)
p
311
Varibles can take on many different types including string (a sequence of characters).
my_string = "this is a string"
type(my_string)
<class 'str'>
Types also include int (a whole number)
n = 3
type(n)
int
float (short for floating point number), or decimal
n = 2.0 / 10.5
type(n)
float
boolean (True or False)
type(True)
bool
and many more.
W3Schools has a good primer on basic types.
Boolean conditions can be created with the ‘<’ (less than) ‘>’ (greater than) and ‘==’ (equal to) operators.
print(2 < 4)
print(2 / 2 == 3 / 3)
print(3 > 4)
print('a' in ['1', 2, 'b'])
True
True
False
False
Data can also be grouped into Data Structures.
Lists are one such data structure. Lists are the simplest form of ordered data in Python. To create a list, seperate values by comma and surround them by square brackets.
fruit = ["apples", "oranges", "figs"]
The built in len function will tell you the length of any data structure for which length is defined, such a list, dictionary, or set.
len(fruit)
3
You can access the values of a list based on their index using this bracket notation. Note that indices are 0 based (or 0-indexed)! So passing in the index 0 will give you the first item, 1 the second, and so on.
fruit[1]
'oranges'
The dictionary data structure is like a list, but each entry in the dictionary has both a key and a value. Think of it just like a paper dictionary: you know a word (the key) that you want to look up, and you are trying to find it’s definition (the value). Create a dictionary with the {curly-bracket} notation below
names = {'first': 'Donald', 'middle': 'J.', 'last': 'Trump'}
Use a key to get the value from a dictionary using square brackets, like you did with the list.
names['last']
'Trump'
Use the if keyword to execute code based on a boolean condition. Use else to handle the False case.
location = "Brooklyn, New York"

if 'B' in location:
  print('yes!')
else:
  print('no :(')
yes!
You can define functions with the def keyword.
Functions are the simplest way to write code that can be reusable.
In this example we are defining a function called add_numbers that takes two arguments: n1 and n2.
add_numbers adds n1 to n2 and then passes the sum back to the place where the function was called using the return keyword.
Notice the indentation. Each line that should be executed when the function is called is tabbed-in exactly once. This is how Python knows what to run and when to exit the function.
def add_numbers(n1, n2):
  value = n1 + n2
  return value
To execute the function, we use the following syntax.
Executing functions is sometimes refered to as ‘calling’ the function.
We’ll call the add_numbers function and print the value it returns.
# Call add_numbers with the arguments 5 and 10, and save the value to the new variable 'result'
result = add_numbers(5, 10)
result
15
Here is a full walkthrough of Python functions.
Objects in python have properties and methods that can be accessed with a dot . sometimes called the dot operator.
For instance, Python’s date module has a method called today() that can be accessed by calling date.today().
Don’t worry too much if you don’t understand this yet; it becomes clear with practice.
# Import python's built in date utilities
from datetime import date

date.today()
datetime.date(2020, 4, 28)
When you use the dot operator you are either telling the object to do something (call a method) or to retrieve a value (access an attribute).
date.today() is a method, meaning that it performs some computation (checks the time) before it gives you the value. date.max on the other hand is an attribute: a value that is stored in date that will immediately return its value.
date.max
datetime.date(9999, 12, 31)
Last thing. You can iterate over a sequence of values, such as a list, with a for loop.
Each indented line after the for keyword will be run for each item in the list provided. In this case, we are iterating over the ingredients list, which has 4 values, so we will call the print function 4 times.
# Define a list of ingredients
ingredients = ['honey', 'mustard', 'oil', 'vinegar']

print("To make dressing:")
# Iterate over each value in the ingredients list using the 'for _ in _' syntax
for current_ingredient in ingredients:
  # print out an instruction with the current ingredient
  print("-> Add a dollop of", current_ingredient, "to the bowl.")
To make dressing:
-> Add a dollop of honey to the bowl.
-> Add a dollop of mustard to the bowl.
-> Add a dollop of oil to the bowl.
-> Add a dollop of vinegar to the bowl.
Read more about loops here: https://www.w3schools.com/python/python_for_loops.asp
Part 1: Basics of Scraping
Load the Python packages we’ll need for this tutorial
# Install BeautifulSoup
!pip install beautifulsoup4
# Import the requests library
# This pacakge underlies most of the tutorial, but you  don't actually need to know
# much more than requests.get(url) More info at: https://2.python-requests.org/en/v2.5.3/user/advanced/
import requests

# Import the BeautifulSoup library
from bs4 import BeautifulSoup
First, let’s navigate to the URL we’d like to scrape. Go ahead and open it in another tab and look at the data format.
url = "http://example.webscraping.com/places/default/index"
Make a request The first thing to do is to get the HTML of the page we are trying to scrape. We will use the Requests library.
response = requests.get(url)
response.status_code
200
We want a 200 (success) status code returned from the request. If you don’t get this, it might be because you’re not connected to the internet, you’ve made a request to the wrong URL, or the page requires that you format your request with specific pieces of information, like login credentials.
response
<Response [200]>
###Taking a look at the HTML
You can uncomment the following line to print the HTML, or you can open the URL from above, right click anywhere on the page and select inspect to view HTML from within the page. Let’s try that now.
# Uncomment this line to print out the full HTML
# print(soup.prettify())
A Quick Summary of HTML Syntax
HTML, or Hypertext Markup Language, is a markup language that defines the structure of almost all modern webpages. It was developed by Tim Berners-Lee in the late 80’s.
HTML is written with tags, each of which is enclosed in diamond brackets.
Most tags require both an opening and closing tag, with some content in between. Tags render as page elements. Here is an example of a paragraph element.

Refer to this guide for a comprehensive list of HTML tags: https://www.w3schools.com/TAGS/default.ASP
Elements can also contain additional information in the form of attributes. We’ll learn how to access attribute values later.
A full HTML page might look something like this. You can think of HTML as a tree, with the <html> tag as the tree’s root, and each element contained within the html tags as a ‘child’ branch.
<!doctype html>
<html lang="en">
	<head>
		<title>My web document</title>
		<link href="main.css" rel="stylesheet" type="text/css" />
	</head>
	<body>
		<p>Hello WWW</p>
	</body>
</html>
The above HTML would be parsed as this tree:

Read more about the HTML tree structure here: https://developer.mozilla.org/en-US/docs/Learn/Getting_started_with_the_web/HTML_basics
You’ll come across many types of tags while scraping the internet. These include tables (<table>), one of the most common ways of storing data, or formatting tags like <b> for bold text.
Another very common tag type is the <a> tag, representing an anchor or hyperlink. Each hyperlink has an href attribute, whose value is the URL that is being linked.
Create a soup object to help parse the html
BeautifulSoup is a Python library that helps parse HTML files.
Now we will take the text from the response we recieved, which is the HTML of the example webscraping site, and pass that along to BeautifulSoup to create a ‘soup’ object for the page.
This soup is a more useful object. It can now be used to find tags and make other specific queries.
soup = BeautifulSoup(response.text, 'html.parser')
Using .find() find() is the simplest of BeautifulSoup’s HTML parsing methods. It will return the first HTML element that matches your query, in this case a ‘table’ Tag. Because there is only one table on the WARN page, this will work fine for us.
# Get the table
table = soup.find('table')

# Here is shorthand syntax for doing the same thing
table = soup.table

# Print the type of the table element
print(type(table))

# Print out the table
# print(table.prettify())
<class 'bs4.element.Tag'>
**Exercise 1 **
In the cell below, use .find() to select the element for the page title (it contains the text “Example web scraping website”). Save it to a variable called title.
You’ll need to look at the page’s HTML and figure out which tag to target.
# write your code here
**Checking your work by accessing the element’s text **
Each Tag contains a string attrbiute with the tag’s text that can be accessed directly with .text.
.text is a string, so we can call it’s built-in string method strip() to remove the whitespace (spaces, tabs, and newlines) from the beginning and end of the string.
Whitespace doesn’t usually affect how HTML is rendered, but it might affect your data, depending on how you plan to use it. Keep this in mind when you are storing the data, and strip whitespace when necessary.
if title.text.strip() == 'Example web scraping website':
  print("Good Job!")
(Here’s what the original text looked like compared to the stripped text)
print('original')
print(title.text)
print('stripped:')
print(title.text.strip())
original

                    Example web scraping website


stripped:
Example web scraping website
Extracting links from the page using find_all()
find_all() is identical to find(), except it will return a list of ALL elements that match in the HTML document.
We call find_all() directly on the table we’ve already extracted, rather than the soup object. This way, we only find matches that are in the table, not other links on the page.
# find_all() called on the table to extract all hyperlink tags: <a>
# find_all() returns a list
link_tags = table.find_all('a')

# Print the number of links using the built in function len()
print('number of links:', len(link_tags))

# Uncomment these lines to take a look
# for link in link_tags:
    # print(link.prettify())
number of links: 10
Accessing Attribute Values
If you look at the links we extracted, you’ll notice that each one is a tag object itself. But our goal is to get just the URL for each site as a string, so that we can scrape each of them individually.
For that, we will extract attribute values using the same square bracket notation we used above to access a dictionary value with a known key.
# Get the first tag (the 0th index, since Python is 0-indexed)
first_tag = link_tags[0]

# Print the href (hyperlink reference) attribute in the link tag
print(first_tag['href'])
/places/default/view/Afghanistan-1
Notice that this is a “relative path”, in other words that the URL of the site is not included.
Optional: construct a list of country pages to scrape
Let’s repeat this for all of our tags with a for loop. The goal is to construct a list of links by:
1.) iterating over the list of link tags
2.) extracting the href attribute from each
3.) appending that to the base URL from before to get the full URL link
4.) add this URL to our list of urls
# Define the base URL for the example site
base_url = "http://example.webscraping.com"

# Create an empty list called links
urls = []

# Iterate over each element in link_tags with a for loop
for tag in link_tags:
  # Get the relative URL path text by accessing the Tag's href attribute
  relative_path = tag['href']

  # Append the relative path string to the base url
  full_path = base_url + relative_path
  urls.append(full_path)

print("Number of urls", len(urls))
print(urls[0])
Number of urls 10
http://example.webscraping.com/places/default/view/Afghanistan-1
Extra assignment: how would you scrape all of the links to each country, not just the ones listed on the first page?
Scraping the individual country pages
Let’s play with a few different ways of scraping the country page. As before, we will request the html and build a soup object around it.
country_url = 'http://example.webscraping.com/places/default/view/Afghanistan-1'
response = requests.get(country_url)
soup = BeautifulSoup(response.text, 'html.parser')
Get all of the rows
# Get the table with the .find() shorthand
table = soup.table

# Get each row in the table
rows = table.find_all('tr')
Attribute Queries
BeautifulSoup gives us the option to be more specific in our queries.
Say you don’t want to find each element that matches a given tag, only ones that have attributes that match a specific value.
Let’s find just the languages spoken in the country. The element we are looking for has an id attribute with the value places_languages__row, so we can use the following syntax to make that query.
# Get only the row with the specific id we are interested in
row = table.find('tr', id="places_languages__row")
print(row)
<tr id="places_languages__row"><td class="w2p_fl"><label class="readonly" for="places_languages" id="places_languages__label">Languages: </label></td><td class="w2p_fw">fa-AF,ps,uz-AF,tk</td><td class="w2p_fc"></td></tr>
Rows <tr> are broken into columns <td>.
From the row we just selected, let’s get the column that contains the text we are looking for, the list of language codes for this country.
This time, we’ll select the column based on it’s class attribute, rather than its id. The class attribute is a common attribute used for styling HTML.
We run into a little bit of an issue because the word ‘class’ is reserved in python for a different use, meaning that if you want to search for it in with find(), you have to use the string “class_” with a trailing underscore, instead. It’s just a quirk you have to learn.
# From that row, get the column (td) with the class 'w2p_fw'
column = row.find('td', class_='w2p_fw')
print(column)

# get the text from the column element
text = column.text
print(text)
<td class="w2p_fw">fa-AF,ps,uz-AF,tk</td>
fa-AF,ps,uz-AF,tk
CSS Selectors
If you know CSS selectors, they are a great time saver from the longer syntax we’ve seen so far. Otherwise, if you’re interested, here is a fun way to learn them, complete with dancing bento boxes. https://flukeout.github.io/
The basic types of selector are as follows.
tagname
.classname
#idname
A word with no punctuation indicates the name of a tag that should be seleected. A word with a period prefix indicates you will select a tag that has class attribute with that name. A hashtag prefix indicates you should select a tag that has an id attribute with that name.
Selectors can be chained. The following example would select all <p> (paragraph) elements that have the class important.
p.important
would select
<p class="important">Some important text</p>
but would not select
<p>Some unimportant text</p>
# Use a CSS selector to select a column of class "w2p_fw" that is inside a row that has id "places_languages__row"
matches = soup.select("tr#places_languages__row td.w2p_fw")
print(matches)

# Note that select returns a list
matches[0].text
[<td class="w2p_fw">fa-AF,ps,uz-AF,tk</td>]


'fa-AF,ps,uz-AF,tk'
Part 2: Real World Example with BeautifulSoup
Now, let’s move onto a real world example. In this case we want the page for Worker Adjustment and Retraining Notification data from the NYC department of labor. https://labor.ny.gov/app/warn/
WARN
The Worker Adjustment and Retraining Notification Act (WARN), enacted in 1989, offers protection to workers by requiring employers to provide notice 60 days in advance of covered plant closings and covered mass layoffs. This notice must be provided to either affected workers or their representatives (e.g., a labor union); to the State dislocated worker unit; and to the appropriate unit of local government.
A notice is triggered when: a plant is closing, causing employment loss for 50 or more full time employees during any 30-day period a mass layoff which does not result from a plant closing, but which will result in an employment loss at the employment site during any 30-day period for 500 or more employees, or for 50- 499 employees if they make up at least 33% of the employer’s active workforce.
Goal At the end of this we will have a spreadsheet that looks like this:
First let’s check that they allow us to scrape their site by looking at their robots.txt file. You shouldn’t scrape a site that doesn’t want you to as it may be against their Terms of Service, and violating a Terms of Service is generally illegal, except in some very special cases.
robots = "https://labor.ny.gov/robots.txt"
print(requests.get(robots).text)
User-Agent: *
Disallow: /etp/
Disallow: /ETP/
Allow: /
User-Agent: gsa-crawler
This one looks like we are allowed to scrape anything on the site starting at its root (indicated by the / after Allow) except the two subdomains /etp/ and /ETP/ so we won’t touch those.
Read more about how to interpret the robots.txt here: https://support.google.com/webmasters/answer/6062608?hl=en
# Identify a target URL, and fetch the HTML
warn_url = "https://labor.ny.gov/app/warn/"
response = requests.get(warn_url)
# Assuming we only want 2020 data
warn_2020_url = "https://labor.ny.gov/app/warn/default.asp?warnYr=2020"
response = requests.get(warn_2020_url)
# Make the soup
soup = BeautifulSoup(response.text, 'html.parser')
Looking at the WARN page
This table looks like the thing we want to parse. We need a list of each link to a WARN record. Let’s extract this list.
As before, get the table with .find()
# Get the table
table = soup.table
Look at the items
# Uncomment the following line to view each 'child' of the table
# for child in table:
#     print(child)
As before, get each of the links with find_all()
# find_all() called on the table to extract all hyperlink <a> tags
# find_all() returns a list
link_tags = table.find_all('a')

# Print the number of links using the built in function len()
print('number of links:', len(link_tags))

# Uncomment these lines to take a look
# for link in link_tags:
#     print(link.prettify())
number of links: 1198
Extract the URL for each WARN record through its href attribute
# Create a list of links
links = []

# Iterate over each <a>
for link in table.find_all('a'):
    # Use the bracket notation to get an attribute from a tag
    # print(link['href'])

    # add the current link text to the list
    links.append(warn_url + link['href'])
print("Found", len(links), "links")

# Print each link
# for link in links:
    # print(link)
Found 1198 links
Try it yourself!
Take a stab at extracting the table from a WARN listing. You should be able to do 1 - 3 with what you’ve learned so far.
import time

example_page_url = 'https://labor.ny.gov/app/warn/details.asp?id=7118'

# 1.) Get the page HTML with a request

html = """Your code here"""

# 2.) Make the soup for the single page

soup = """Your code here"""

# 3.) Get the first table in the page using the soup (there should only be one)

table = """Your code here"""

# 4.) Get all text in the table using BeautifulSoup's built in funciton get_text()
# get_text() will get all text in all elements underneath the current element,
# in this case all of the text in the <p> tags
table_text = """Your code here"""

# 5.) Split the text into a list of lines based on the newline character '\n'
lines = """Your code here"""

# 6.) Iterate over each line and extract the relevant bits of information

data = {}
for line in lines:
  """Your code here"""
Production level requests
We’re doing a few things differently here.
First, we’ve defined a function to handle making the request and retrieving the HTML. The function takes as an argument the url to request, and returns an HTML string.
It does a couple of other things. Not all pages returned by the WARN site are properly unzipped (it has something to do with the site not returning proper headers), so we check if the page is zipped and unzip it with gzip if so.
Take a breath. Because we’re scraping repeatedly, it’s very important to add a delay in between each request. We accomplish this with Python’s time.sleep() method. We do this to be respectful internet citizens, and good journalists. It’s not uncommon to be scraping a few hundred thousand records at a time. Not all servers are designed to handle the load that any amount of scraping can create. By hitting a URL just a few dozen times, you risk being blocked by the server, which blocks your IP address in order to prevent the server being overloaded.
# We are going to install a simple progress bar library called TQDM
# that estimates how much longer your loop will take to run.
# It's nice for long, sequential tasks
!pip install tqdm
Requirement already satisfied: tqdm in /usr/local/lib/python3.6/dist-packages (4.38.0)
# Import the time library to let us wait in between each request
import time
# gzip allows us to unzip improperly zipped files
import gzip

from tqdm import tqdm

def get_page(url):

    # Fetch the page
    response = requests.get(url)

    # This is pretty atypical. Some of these pages are not being unzipped correctly
    # If the request didn't automatically unzip the html, we have to do it ourselves
    # We can check the encoding that the requests library thinks the page has returned
    if response.apparent_encoding is None:
        html = gzip.decompress(response.content).decode('utf-8')
    else:
        html = response.text

    # Remove non-breaking space characters in the HTML
    html = html.replace(' ', ' ')

    return html


# Create a list of HTML pages
warn_pages = []

for link in tqdm(links):
    html = get_page(link)
    warn_pages.append(html)

    # DON"T FORGET TO SLEEP FOR A BIT!
    # rest for a quarter second
    # This is really really im
    time.sleep(1)

print('done fetching data')
100%|██████████| 1198/1198 [07:33<00:00,  2.64it/s]

done fetching data
print(len(warn_pages))
1198
import re

def parse_warn_page(html, url):
    # Create a dictionary to store the data for a single WARN listing
    page_data = {'URL': url}

    # Make the soup for the single page
    page_soup = BeautifulSoup(html, 'html.parser')

    # Sanity check
    # print(page_soup.prettify())

    # Get the first table (there should only be one)
    table = page_soup.table

    # Get all text in the table
    # get_text() will get all text in all elements underneath the current element,
    # in this case all of the text in the <p> tags
    table_text = table.get_text()

    # Use a regular expression to throw away some extra info we don't care about
    table_text = re.split('(?:Additional|Other|Location).*', table_text)[0]

    # Split the text into a list of lines based on the newline character '\n'
    lines = table_text.split('\n')

    # Iterate over each line
    for line in lines:
        line = line.strip()
        line = line.replace('  ', ' ')
        line = line.replace('Dates', 'Date')
        line = line.replace('Counties', 'County')
        line = line.replace('Contact(s)', 'Contact')
        split_text = line.split(':', 1)

        if len(split_text) == 2:
            key = split_text[0]
            value = split_text[1]
            page_data[key] = value

            # The County data is formatted weirdly, using | to delimit some columns we want in our data
            if key == 'County':
              split_row = value.split('|')
              page_data['County'] = split_row[0]
              for loc_data in split_row[1:]:
                split_loc_data = loc_data.split(':')
                key = split_loc_data[0]
                value = split_loc_data[1]
                page_data[key] = value


    return page_data


# Create a list to store the data we scrape.
# Each item in the list will correspond to a single WARN listing
# Each column will be a piece of single labeled piece information from the listing
data = []

for html_page, link in zip(warn_pages, links):
    page_data = parse_warn_page(html_page, link)
    data.append(page_data)

print('done parsing html')
1198it [00:25, 47.48it/s]

done parsing html
Take a look at the data by with Pandas
# Import the pandas library
import pandas as pd

# Add our data to a new DataFrame
df = pd.DataFrame(data)
Export the data to a CSV or Excel
# If this fails, uncomment the next line
# !pip install openpyxl
df.to_excel("warn_data.xlsx")
df.to_csv("warn_data.csv", sep='\t')

# to load this csv into pandas, run the following line
# df = pd.read_csv("warn_data.csv")
Use a Regular Expression (regex) to check that each Date of Notice is formatted correctly
Regular expressions, abbreviated regex, is a syntax for defining patterns of text. You can use regular expressions to find patterns such as dates and names within a larger text, or for checking whether that text adheres to the pattern you’ve defined.
Here is a good introduction to regex: https://regexone.com/
Here is an introduction for the specific python syntax: https://docs.python.org/3/howto/regex.html
Here’s a useful tool for checking your regular expression: https://regexr.com/
# Filter for valid dates using a regex
valid_dates = df[df['Date of Notice'].str.match(' [0-9]+/[0-9]+/[0-9]{4}')]

# Check that the number of records with a valid Date of Notice matches the total number of records
print(len(valid_dates) == len(df))
True
# ! pip install python-dateutil
from dateutil.parser import parse
import re

# Make a copy of our original dataframe
parsed_df = df.copy(deep=True)

def convert_to_first_date(x):
  try:
    # Find all dates in the string x and keep the first one
    date_string = re.findall('[0-9]{1,2}/[0-9]{1,2}/[0-9]{4}', x)[0]
    return parse(date_string)
  except Exception as e1:
    try:
      # If the first attempt to parse throws an error, try parsing the whole string
      return parse(x)
    except Exception as e2:
      # If that still doesn't work, return None to indicate that no dates were found in the string
      return None
    return None

parsed_df['Layoff Date'] = df['Layoff Date'].apply(convert_to_first_date)
parsed_df['Date of Notice'] = df['Date of Notice'].apply(convert_to_first_date)
parsed_df['Closing Date'] = df['Closing Date'].apply(convert_to_first_date)
# Visualize the parsed dates alongside the strings
# for (a, b) in zip(df['Closing Date'], parsed_df['Closing Date']):
#   print(a, 'parsed', b)
Checkpoint
# Load the data from github
url = "https://github.com/computationaljournalism/columbia2020/raw/master/data/parsed_warn_data.csv"
parsed_df = pd.read_csv(url, sep="\t", encoding="latin1")
Visualize the data with Plotly
# !pip install plotly
# import plotly.graph_objects as go
import plotly.express as px
import plotly.graph_objects as go

dates_labels = ['Layoff Date', 'Date of Notice', 'Closing Date']
label = dates_labels[0] # Change this number to either 0, 1, 2 to cycle through these plots

fig = px.histogram(parsed_df, x=label, nbins=100)
fig.update_layout(
    title_text= label + ' Histogram', # title of plot
    yaxis_title_text='Notice Count', # yaxis label
    # bargap=0.2, # gap between bars of adjacent location coordinates
    bargroupgap=0.1 # gap between bars of the same location coordinates
)
fig.show()
Part 3: Selenium: How to (almost) log in to the New York Times
So far, we’ve interacted with static websites by pulling their HTML onto our local computer and then pulling out the information we need from that HTML.
But what if we want to interact with a site by pushing buttons, filling out a form, or dragging web components across the screen? In steps Selenium.
Selenium allows us to interact with a web browser like Google Chrome or Firefox with simple Python code. Usually, this is done with the browser in headless mode, meaning that it is rendering HTML and Javascript in the background but not displaying the page for us to see. It can be useful to install Selenium onto your local computer (rather than using Colab) for you to use it in non-headless mode, which will let you see how it is navigating through URL’s and clicking in real time, which is helpful for debugging.
First, install Selenium and the Chromium driver
!pip install selenium
!apt-get update # to update ubuntu to correctly run apt install
!apt install chromium-chromedriver
!cp /usr/lib/chromium-browser/chromedriver /usr/bin
import sys
sys.path.insert(0,'/usr/lib/chromium-browser/chromedriver')
from selenium import webdriver
chrome_options = webdriver.ChromeOptions()
chrome_options.add_argument('--headless') # See wikipedia https://en.wikipedia.org/wiki/Headless_browser
chrome_options.add_argument('--no-sandbox')
chrome_options.add_argument('--disable-dev-shm-usage')
Requirement already satisfied: selenium in /usr/local/lib/python3.6/dist-packages (3.141.0)
Requirement already satisfied: urllib3 in /usr/local/lib/python3.6/dist-packages (from selenium) (1.24.3)
Get:1 http://security.ubuntu.com/ubuntu bionic-security InRelease [88.7 kB]
Hit:2 https://cloud.r-project.org/bin/linux/ubuntu bionic-cran35/ InRelease
Ign:3 https://developer.download.nvidia.com/compute/cuda/repos/ubuntu1804/x86_64  InRelease
Hit:4 http://ppa.launchpad.net/graphics-drivers/ppa/ubuntu bionic InRelease
Ign:5 https://developer.download.nvidia.com/compute/machine-learning/repos/ubuntu1804/x86_64  InRelease
Hit:6 http://archive.ubuntu.com/ubuntu bionic InRelease
Hit:7 https://developer.download.nvidia.com/compute/cuda/repos/ubuntu1804/x86_64  Release
Hit:8 https://developer.download.nvidia.com/compute/machine-learning/repos/ubuntu1804/x86_64  Release
Get:9 http://archive.ubuntu.com/ubuntu bionic-updates InRelease [88.7 kB]
Hit:10 http://ppa.launchpad.net/marutter/c2d4u3.5/ubuntu bionic InRelease
Get:11 http://archive.ubuntu.com/ubuntu bionic-backports InRelease [74.6 kB]
Fetched 252 kB in 2s (150 kB/s)
Reading package lists... Done
Reading package lists... Done
Building dependency tree
Reading state information... Done
chromium-chromedriver is already the newest version (80.0.3987.163-0ubuntu0.18.04.1).
0 upgraded, 0 newly installed, 0 to remove and 97 not upgraded.
cp: '/usr/lib/chromium-browser/chromedriver' and '/usr/bin/chromedriver' are the same file
Make the request
WebDriver.get() will wait until the page load most of the page, including Javascript widgets that normally wouldn’t be rendered with a simple requests.get().
What’s happening in the background? Selenium waits for Javascript’s onload() callback to be fired. This does not always guarantee that everything in the page will be loaded though. If Selenium can’t seem to find a page element that should be there, you might need to look at its system of waits. We’re not going to touch that here.
# Create a webdriver object
wd = webdriver.Chrome('chromedriver', options=chrome_options)
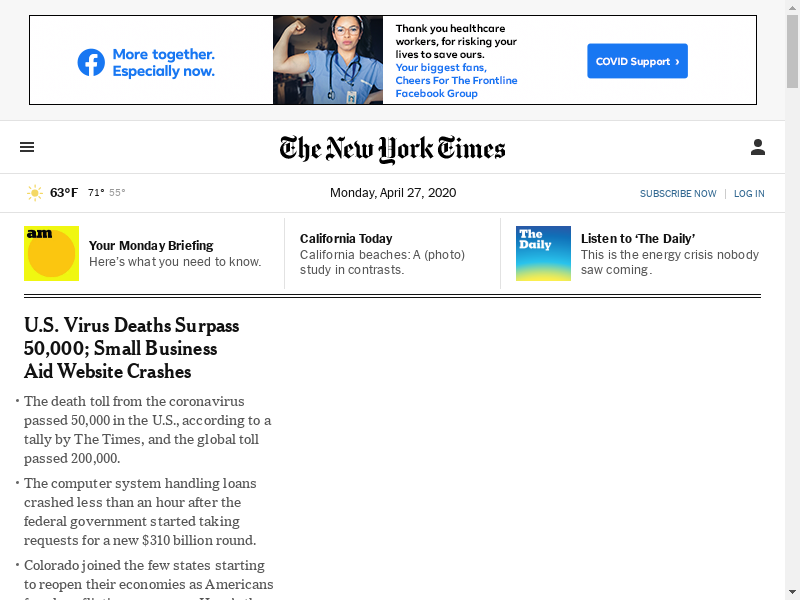
# Get the NYTimes homepage
wd.get("https://www.nytimes.com/")
Inspect the homepage source HTML. Just like before, it’s a good idea to open the page in your browser window and inspect the source from there.
# Uncomment this line to see the HTML
# print(wd.page_source)
Check that it succeeded
Check out the title of the page. This can be a first pass at detecting errors.
wd.title
'The New York Times - Breaking News, World News & Multimedia'
Next, we’ll use the PIL (Python Image Library) to view a live screenshot of the page, as Selenium sees it.
We’ll use the WebDriver’s get_screenshot_as_png() method to get the image.
from PIL import Image
from io import BytesIO
screenshot = wd.get_screenshot_as_png()
image = Image.open(BytesIO(screenshot))
image
Let’s select the login button
We’ll use the class name of the element.
from selenium.webdriver.common.by import By

login_button = wd.find_element(By.CLASS_NAME, "css-1uu5f4u")
We didn’t have to use the class name though. We could have used the id or tag name, or better yet, we could have selected with XPATH or CSS Selectors, like in the bento game.
Here are the full list of ‘By’ methods that Selenium supports for element selection.
ID = "id"
XPATH = "xpath"
LINK_TEXT = "link text"
PARTIAL_LINK_TEXT = "partial link text"
NAME = "name"
TAG_NAME = "tag name"
CLASS_NAME = "class name"
CSS_SELECTOR = "css selector
Look at the source code for the selected button
login_button.get_attribute('outerHTML')
'<a href="https://myaccount.nytimes.com/auth/login?response_type=cookie&client_id=vi" data-testid="login-link" class="css-1uu5f4u">Log In</a>'
View a partial screenshot of the element you selected
It can be helpful, especially if you are in a headless browser, to double check you have selected the right element by viewing a screenshot of that element.
# Use the built-in screenshot_as_png property to get the PNG file as a byte array
png = login_button.screenshot_as_png

# Send the bytes data into a viewable Image object
image = Image.open(BytesIO(png))
image

Perfect, just the login button we wanted.
# Check out a few of the other things we could do with the button
# help(login_button)
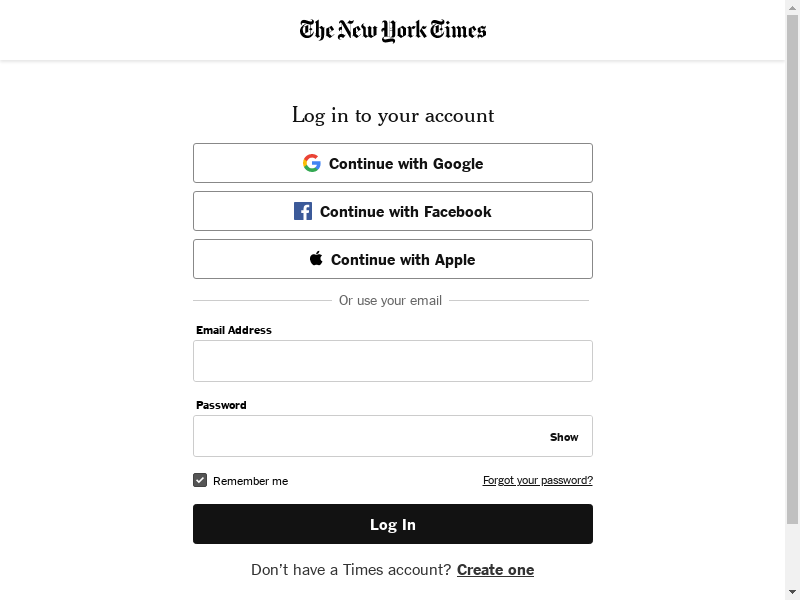
Now let’s click the button
It’s pretty straightforward
login_button.click()
Print out the current screen to verify it worked
screenshot = wd.get_screenshot_as_png()
image = Image.open(BytesIO(screenshot))
image
Let’s select the elements we’ll need to log in. The username + password fields, and the login button.
username = wd.find_element(By.ID, "username")
password = wd.find_element(By.ID, "password")
submit_login = wd.find_element(By.CLASS_NAME, "css-nrhj9s-buttonBox-buttonBox-primaryButton-primaryButton-Button")
Properly coded websites can be slippery to scrape. Class or tag names might change depending on subtle things like the size of the window or even the time of day. Designing a rock-solid selenium parser is an exercise in patience as well as problem solving.
# Depending on which version of the page you recieved, you might have HTML that is formatted very differently.
# So, the previous cell didn't work, try this one.
# username = wd.find_element(By.ID, "email")
# password = wd.find_element(By.NAME, "hiddenPassword")
# submit_login = wd.find_element(By.CLASS_NAME, "css-nrhj9s-buttonBox-buttonBox-primaryButton-primaryButton-Button")
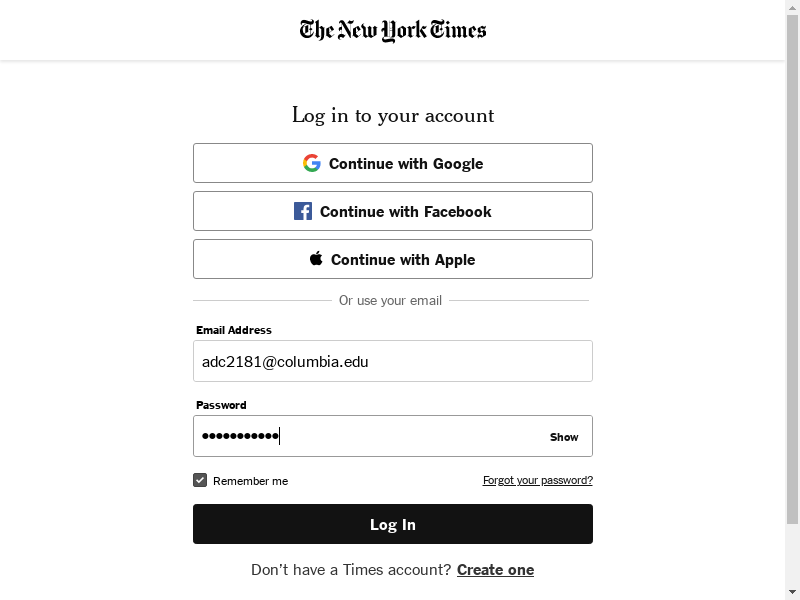
Now, let’s type our username and password. Because username and password are elements, we can use the send_keys() function.
# from selenium.webdriver.common.action_chains import ActionChains

# Replace these with your email / password
username.send_keys("adc2181@columbia.edu")
password.send_keys("my_password")
full_page_png = wd.get_screenshot_as_png()
image = Image.open(BytesIO(full_page_png))
image
Make a mistake? Clear the field
Just like you’d do manually. CTRL + A and delete
from selenium.webdriver.common.keys import Keys
username.send_keys(Keys.CONTROL + "a");
username.send_keys(Keys.DELETE);
password.send_keys(Keys.CONTROL + "a");
password.send_keys(Keys.DELETE);

# View the cleared form
# full_page_png = wd.get_screenshot_as_png()
# image = Image.open(BytesIO(full_page_png))
# image
Finally, let’s press the login button
submit_login.click()
full_page_png = wd.get_screenshot_as_png()
image = Image.open(BytesIO(full_page_png))
image

It didn’t quite finish loading just then… Wait a second and take another screenshot.
full_page_png = wd.get_screenshot_as_png()
image = Image.open(BytesIO(full_page_png))
image
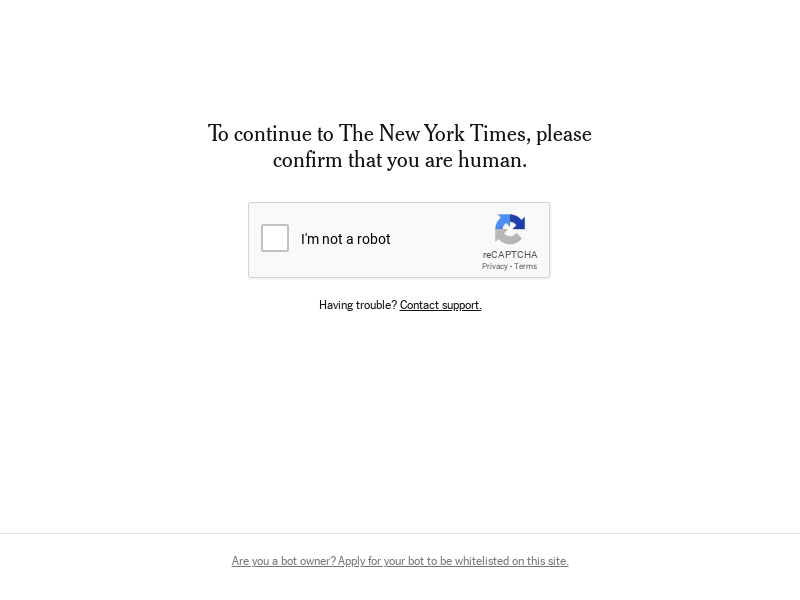
Oh.
So we could try manually filling out the captcha to try to convince the NYT that we aren’t robots, but you probably won’t succeed.
Turns out that sites protected by a reCAPTCHA like this are not going to be good targets for scraping, so best to check this before you build the scraper.
But most sites are not protected this way, and regardless, these lessons: selecting elements and then using .click() or .send_keys() to interact with the document will transfer over to many scraping and web automation tastks.